




Microcement at Funkygine’s cabin: two bathrooms, a laundry room and an entrance hall with no grout lines
Zenzorama installed microcement in two bathrooms, the laundry room and the entrance hall at the cabin of Jørgine Vasstrand, known as Funkygine. Here’s the project, how it was built up and what you should know before choosing microcement for your bathroom.

Advertisement / collaboration: Zenzorama sponsored the microcement for Jørgine Vasstrand’s (Funkygine’s) cabin. This post was written by Zenzorama.
At the cabin of Jørgine Vasstrand, better known as Funkygine, Rune Haraldsen of Zenzorama applied Feltona Cretezenz microcement to the floors and walls of two bathrooms, the utility room and the entrance hall. The result is continuous surfaces without tiles or grout lines. Here, we showcase the project, explain how microcement is applied, and what to consider if you’re thinking about using it in your home or cabin.
The project: two bathrooms, a utility room and an entrance hall at the cabin
Funkygine wanted a calm, Scandinavian look. In 2021, Rune Haraldsen of Zenzorama applied microcement to both the floors and walls in the two bathrooms, the utility room and the entrance hall. By using the same type of surface in several rooms, the cabin has a cohesive look without grout lines.

In general, wet zones such as showers must be built up using an approved waterproofing system that complies with current wet-room requirements, and the work must be carried out by a professional. The build-up is determined for each individual project.
What Funkygine wrote about the microcement
When the cabin was finished, Jørgine showed it off in her blog post “The cabin tour is finally ready!!” (October 25, 2021). The post is marked as an advertisement for Zenzorama, as we sponsored the microcement. She writes:
“Both bathrooms, the utility room and the hallway are finished in microcement. It was actually on the recommendation of some of you that I contacted Zenzorama to find out what microcement really is. I don’t regret it for a second, and I’m incredibly happy with the result.”
- Jørgine Vasstrand, funkygine.com (sponsored collaboration, 2021)
Video: Jørgine Vasstrand / funkygine.com (cabin tour on YouTube)
What is microcement?
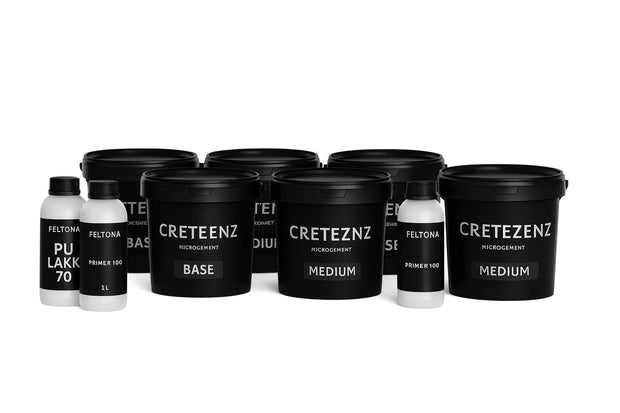
Microcement is a thin, cement-based coating around 3 mm thick (depending on the system and substrate) that is applied directly to the existing substrate to create a single seamless surface without grout lines. It can be used in bathrooms, on floors and walls, in kitchens and on stairs. At Zenzorama, we use Feltona Cretezenz, a complete system comprising primer, base coat, topcoat and PU lacquer. This is the system we used at Funkygine’s cabin.
Microcement in bathrooms and utility rooms
In bathrooms and utility rooms, microcement creates a continuous surface on floors and walls, without grout lines where dirt can collect, making the surfaces easy to clean. The topcoat makes the surface more resistant to spills, stains and wear.
Read more about microcement in bathrooms.


Microcement on floors in entrance halls and hallways
In an entrance hall, the floor is subject to daily wear from shoes, snow, gravel and luggage. Microcement provides a durable surface when sealed correctly, but requires a stable substrate and a topcoat that can withstand wear and cleaning. Learn more about microcement on floors.
Can microcement be applied over tiles?
In general, microcement can often be applied in a thin layer over existing tiles, provided the substrate is stable and has been properly prepared. This can save you from having to remove the tiles. However, the substrate must be assessed for each project, as the preparation is what determines the result.
How microcement is applied
Microcement is applied in several thin layers using a trowel, with sanding between layers. A standard build-up is around 3 mm thick, depending on the system and substrate:
- Preparation: The substrate is cleaned and sanded, and must be stable, clean and dry. A waterproofing membrane is applied in wet zones.
- Primer: Ensures adhesion between the substrate and the microcement.
- Two base coats: Applied with a trowel to build strength and an even surface, with light sanding between coats.
- Two topcoats: Create the finished surface, colour and texture.
- Topcoat lacquer: Seals the surface and provides the desired sheen, while making it more resistant to spills, stains and wear.
Want to do it yourself? See our complete guide to how to apply microcement and our full range of microcement.
Colours and finishes
Microcement can be customised with different colours and textures, from light and understated to darker and more dramatic. We mix colours to order, including to match NCS codes. Feel free to request colour samples, as the tone and texture look different in different lighting.

How much does microcement in a bathroom cost?
Professionally installed microcement in a bathroom costs from NOK 2,500 to 3,500 per m², including materials and VAT. The minimum charge for a job is NOK 30,000, and plumbing, electrical work and other trades are additional. If you install it yourself, materials cost NOK 650-900 per m². Send us details of the room, measurements and photos, and we’ll provide a specific recommendation and a no-obligation quote.
Frequently asked questions
Can microcement be used in bathrooms and showers?
Yes, with the correct build-up. In showers and other wet zones, an approved waterproofing system must be installed underneath, and the work should be carried out by a professional in accordance with current wet-room requirements.
Do I need to remove the tiles before applying microcement?
Not always. Microcement can often be applied over existing tiles, but the substrate must be stable and properly prepared, and it must be assessed for each project.
How thick is microcement?
Around 3 mm, depending on the system and substrate, for a standard build-up with primer, two base coats, two topcoats and lacquer.
Is microcement suitable for a cabin?
Yes. Seamless surfaces without grout lines are easy to keep clean, and the same finish can be used on floors and walls in several rooms.
How much does microcement cost?
Professionally installed microcement costs from NOK 2,000 to 3,000 per m² on floors and from NOK 2,500 to 3,500 per m² in bathrooms, including materials and VAT. The minimum charge for a job is NOK 30,000. If you install it yourself, materials cost NOK 650-900 per m².
Skal badet bli uten fuger?
Send oss mål og noen bilder av badet. Du får råd om oppbyggingen og et uforpliktende pristilbud.
Legg selv
Skriv inn arealet, så regner Pakkevelgeren ut materialet du trenger og hva det koster.


